Wget : Resume broken ISO download

Wget is a free ftp/http downloader available on all Linux distributons and has a windows clone, it has a lot of useful options and it is helpful in a lot of downloading tasks, for example it can be used to download entire website for offline browsing, download specific file types from a webpages. Like source files from a certin website … etc.

One of the benefit i got recently from wget is resume feature, i have been downloading ubuntu iso image using firefox download manager, then at 65% download stoped and firefox tell me download completed (sure it was wrong).

I searched and found -c option to continue/resume broken download. so i got the iso link i was downloading, then i use wget to resume downloading :

wget -c http://us.releases.ubuntu.com//maverick/ubuntu-10.10-desktop-i386.iso

Also one of the greatest feature i use to not starve my other newtork activities (e.g. browsing, other persons bandwidth on local network)) is using –limit-rate to set maximum download speed of wget(in Bytes/sec unit).

wget --limit-rate=40k -c http://us.releases.ubuntu.com//maverick/ubuntu-10.10-desktop-i386.iso

Kill a process using name

This a small post about a linux command make my life easier, when i want to kill a process i was using to get PID then use kill with this process PID, this was require that i do the next long line:

kill < `ps aux | grep process_to_kill | awk ‘{print $2}’ | head -n 1`

Recently, i found the equivalent of this painfull line 🙂 :

pkill process_to_kill

But without the first line i used to use i wouldn’t get familiar with ps, awk, head, tail. But now for sure i will use pkill :).

Lenovo SL510 slow HardDisk problem with CentOS [SOLVED]

It has been a while since i was living with Lenovo SL510 slow performance with Centos 5.3.

I had made a lot of research for this problem, one of the best tool i used to fix problem is hdparm tool, this tool will give you all information and help you tuning harddisk performance.

The problem was CentOS installer find the harddisk drives as /dev/hdx where as a SATA harddisk should be seen as /dev/sdx. Measuring performance of harddisk using hdparm gives:

/sbin/hdparm -t /dev/hda

gives about 3MB/Sec while for SATA HD it should be in range from 50-90 MB/sec.

It turns out that the IDE driver was loading before the SATA driver (ata_piix) (I think in initrd) and that caused the drives to be found as /dev/hdx instead of /dev/sdx and when it tries to load SATA driver it gives


ata_piix 0000:00:1f.2: version 2.11
ata_piix 0000:00:1f.2: MAP [ P0 P2 IDE IDE ]
ACPI: PCI Interrupt 0000:00:1f.2[B] -> GSI 16 (level, low) -> IRQ 16
ata_piix 0000:00:1f.2: 0x1F0 IDE port busy
ata_piix 0000:00:1f.2: 0x170 IDE port busy
ata_piix 0000:00:1f.2: no available legacy port

Adding hda=noprobe hda=none to kernel arguments in /boot/grub/grub.conf file then reboot solves the problem.

Now “/sbin/hdparm -t /dev/sda” gives 65 MB/sec (Amazing) and all partitions now are seen as /dev/sdx.

Now the SL510 performance is great as it should be (Boot in less than 1.5 min), and fast copy and move folders.

Terminator – Make life on terminal easier

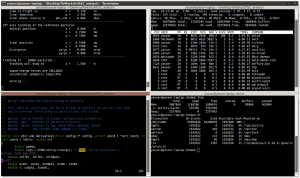
Terminator is terminal emulator that allow you to split window into multiple terminals on the screen without using tabs or multiple windows as in gnome terminal. It has the advantage of working in one terminal and seeing all what happens in other terminals.

When you open terminator you can use the following few key combinations to work with terminator:

* Ctrl-Shift-E: To split the view vertically.
* Ctrl-Shift-O: To split the view horizontally.
* Ctrl-Shift-P: For focus to be active on the previous view.
* Ctrl-Shift-N: For focus to be active on the next view.
* Ctrl-Shift-W: To close the focused view.
* Ctrl-Shift-Q: To exit terminator.
* F11: Fullscreen.

enjoy.

NOURIX: Micro small rescue LiveCD

I had a problem before while I’m on travel that Linux laptop i had doesn’t boot up and needs rescue CD to reinstall GRUB, but at that time i didn’t have that CD which in most distributions is the first CD of the distribution, so i had to download it from the web, i was lucky that day, the company i was in has a high speed internet connection.

So i made a small command line GNU/linux  ISO CD called NOURIX (only 2.7MB) that it’s used only to reinstall GRUB, the GNU/linux has kernel 2.6.20 and busybox 1.2.2, syslinux-3.8 and GRUB 0.97.

I upload it on my gmail, and if this problem happen again, i will download it easily even with low speed internet connection, burn it on a CD or miniCD., Reinstall GRUB, and boot installed linux and return back to work.

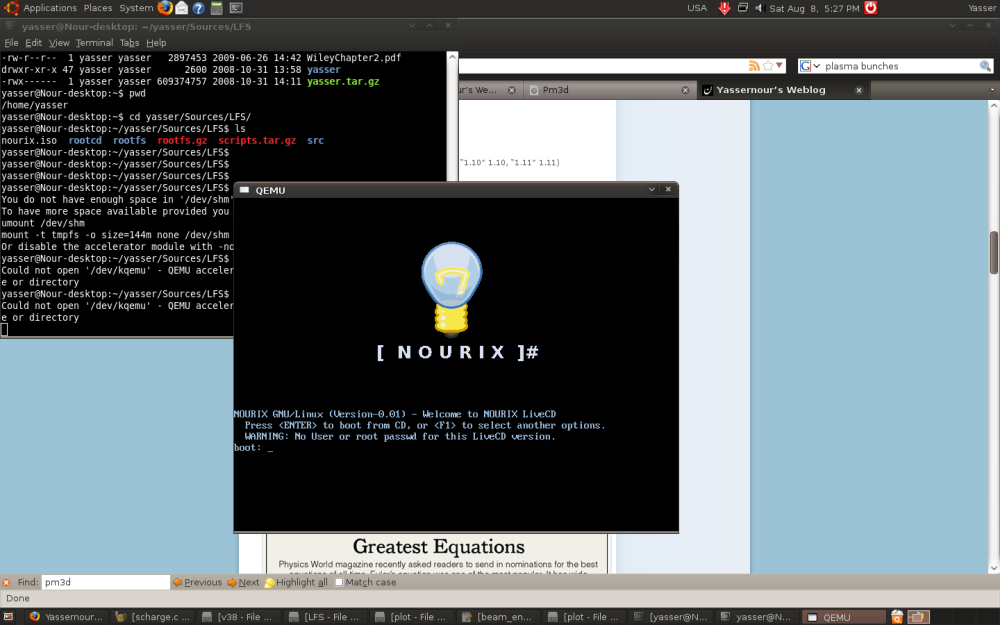
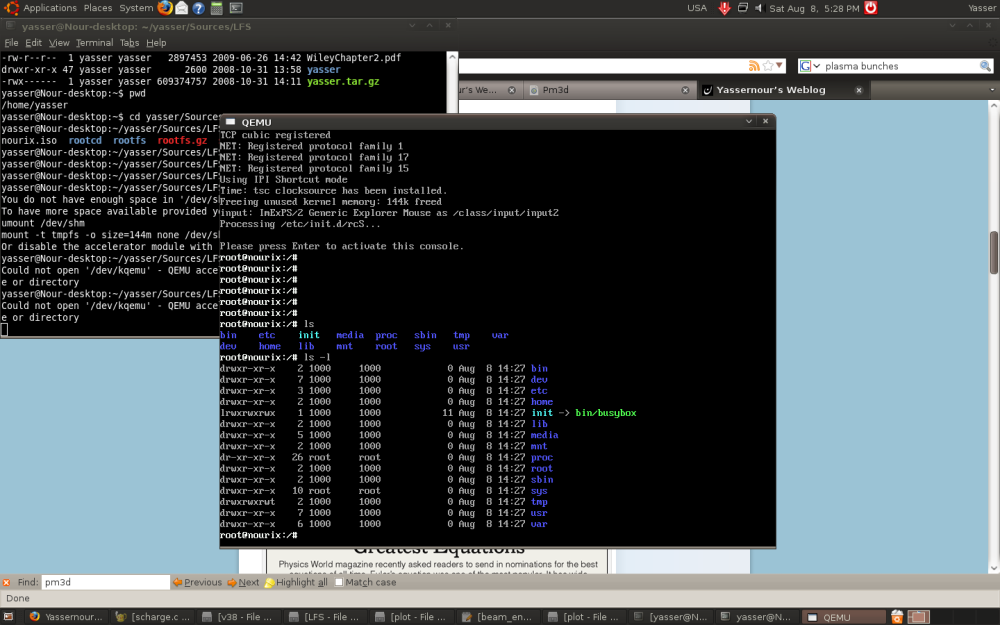
Here are screenshots of  NOURIX running in Qemu:

NOURIX boot screen
NOURIX boot screen

Screenshot-3

Ubuntu on Qemu

I finally have been successfully install Ubuntu 7.10 on my SuSE linux on Qemu (A powerful Machine Emulator), it looks nice, the drawback of Ubuntu in my opinion is that it need a connection to internet to install packages which not always available.

Here are the steps i do to install it on Qemu:

1- First, make sure that you have Qemu installed, If not, for linux users get qemu binaries from QEMU site http://bellard.org/qemu/ then just extract it. In extracted folder you should find the qemu binaries.

2- Then, we make the image file that Ubuntu will be installed on, Ubuntu will see it as it’s the PC hard disk. we make this by qemu-img command.

#qemu-img create ubuntu.img -f qcow2 4G

This will make a 4GBytes image named ubuntu.img

Now, we are ready to install Ubuntu on Qemu, if you have the Ubuntu CD you run the next command

#qemu -m 256 -cdrom /dev/cdrom -boot d ubuntu.img

This command make qemu boot from the CDROM and with RAM 256MB, if you have iso file for ubuntu replace /dev/cdrom by your iso file

The installer will appear, go with the steps of installer. after the installation finish, remove the CD and boot from the image by the command

#qemu -m 256 -boot a ubuntu.img

This will make qemu boot from the harddisk A represented by ubuntu.img with memory 256MBytes.

Keep in mind that the installation take longer time than normal installion, my installation took 4 hours on a 2.6GHz PC.

See the picture, Ubuntu 7.10 running in Qemu on my SuSE 10.1